For ordinary walking and hiking, the main advantage of a powered exoskeleton is help lifting and moving your legs, especially on sustained climbs and steps. People who find that climbing demanding may notice the difference more than people who already exercise regularly. To get useful assistance, match the device to your route and make room for its weight, battery, and attachments in your walking setup.
The benefit starts with the task
A leg-assist device is most useful when its support fits something you want to do. For a day hiker, that might be repeated steps on a climb. For someone taking a long outdoor walk, it might be maintaining a comfortable rhythm while leaving energy for the return.
In a group outing, one companion said the assistance had made reaching the top possible for him, while the person documenting the trip felt a smaller change. Both experiences belonged to the same walk. Choose the setting and pace for the person wearing the equipment rather than trying to keep everyone on the same level of assistance.
A regular exerciser who often climbed stairs also described a smaller change in effort. For a walker already comfortable on the intended route, try the equipment on a familiar climb and decide whether the added assistance feels useful there. A gentler setting may fit that task better than the maximum.
Give yourself time to get comfortable
The sensation of assistance may become clearer after some walking. One first-time wearer who described their fitness as limited felt the benefit after one to two hours of walking with stops. An unhurried introduction gives you time to adjust the fit and learn how the support feels.
Allow room for an easy first outing. A wearer walking in stages noticed clear assistance close to two hours into the outing, then hurried up a steep section and saw a heart-rate reading of 164 beats per minute before slowing down. Keep checking your breathing and usual effort cues even when your legs feel ready to move faster.
The practical advantage is more comfortable movement at an appropriate effort. Use the National Park Service’s hiking guidance to plan breaks and choose a pace at which you can talk. When the assistance feels good, enjoy that steadier pace rather than immediately adding speed or distance.
Before setting out with a group, learn the controls and how to release and refit the straps. Leave time at the trailhead for that introduction so the first climb can be about walking comfortably.
What to consider alongside the assistance
The useful trade-offs are concrete: where the equipment sits, what it adds to your load, and how it feels through the entire outing. Each one can be checked during a short trial.
Potential benefit
What to consider
What to do during a trial
Help lifting your legs uphill
The timing needs to suit your stride
Try ordinary steps, shorter steps, and a pause
More comfortable climbing
Your breathing and effort still need attention
Hold a conversational pace and take breaks
Support over a longer walk
Battery use and worn comfort change the plan
Include the return and a period with assistance switched off
Assistance while carrying a bag
A waist battery may contact the pack
Fit both pieces with your intended load
Adjustable support
The strongest level may feel different on flat ground
Choose the mode for the activity, then adjust gently
Keep your backpack comfortable
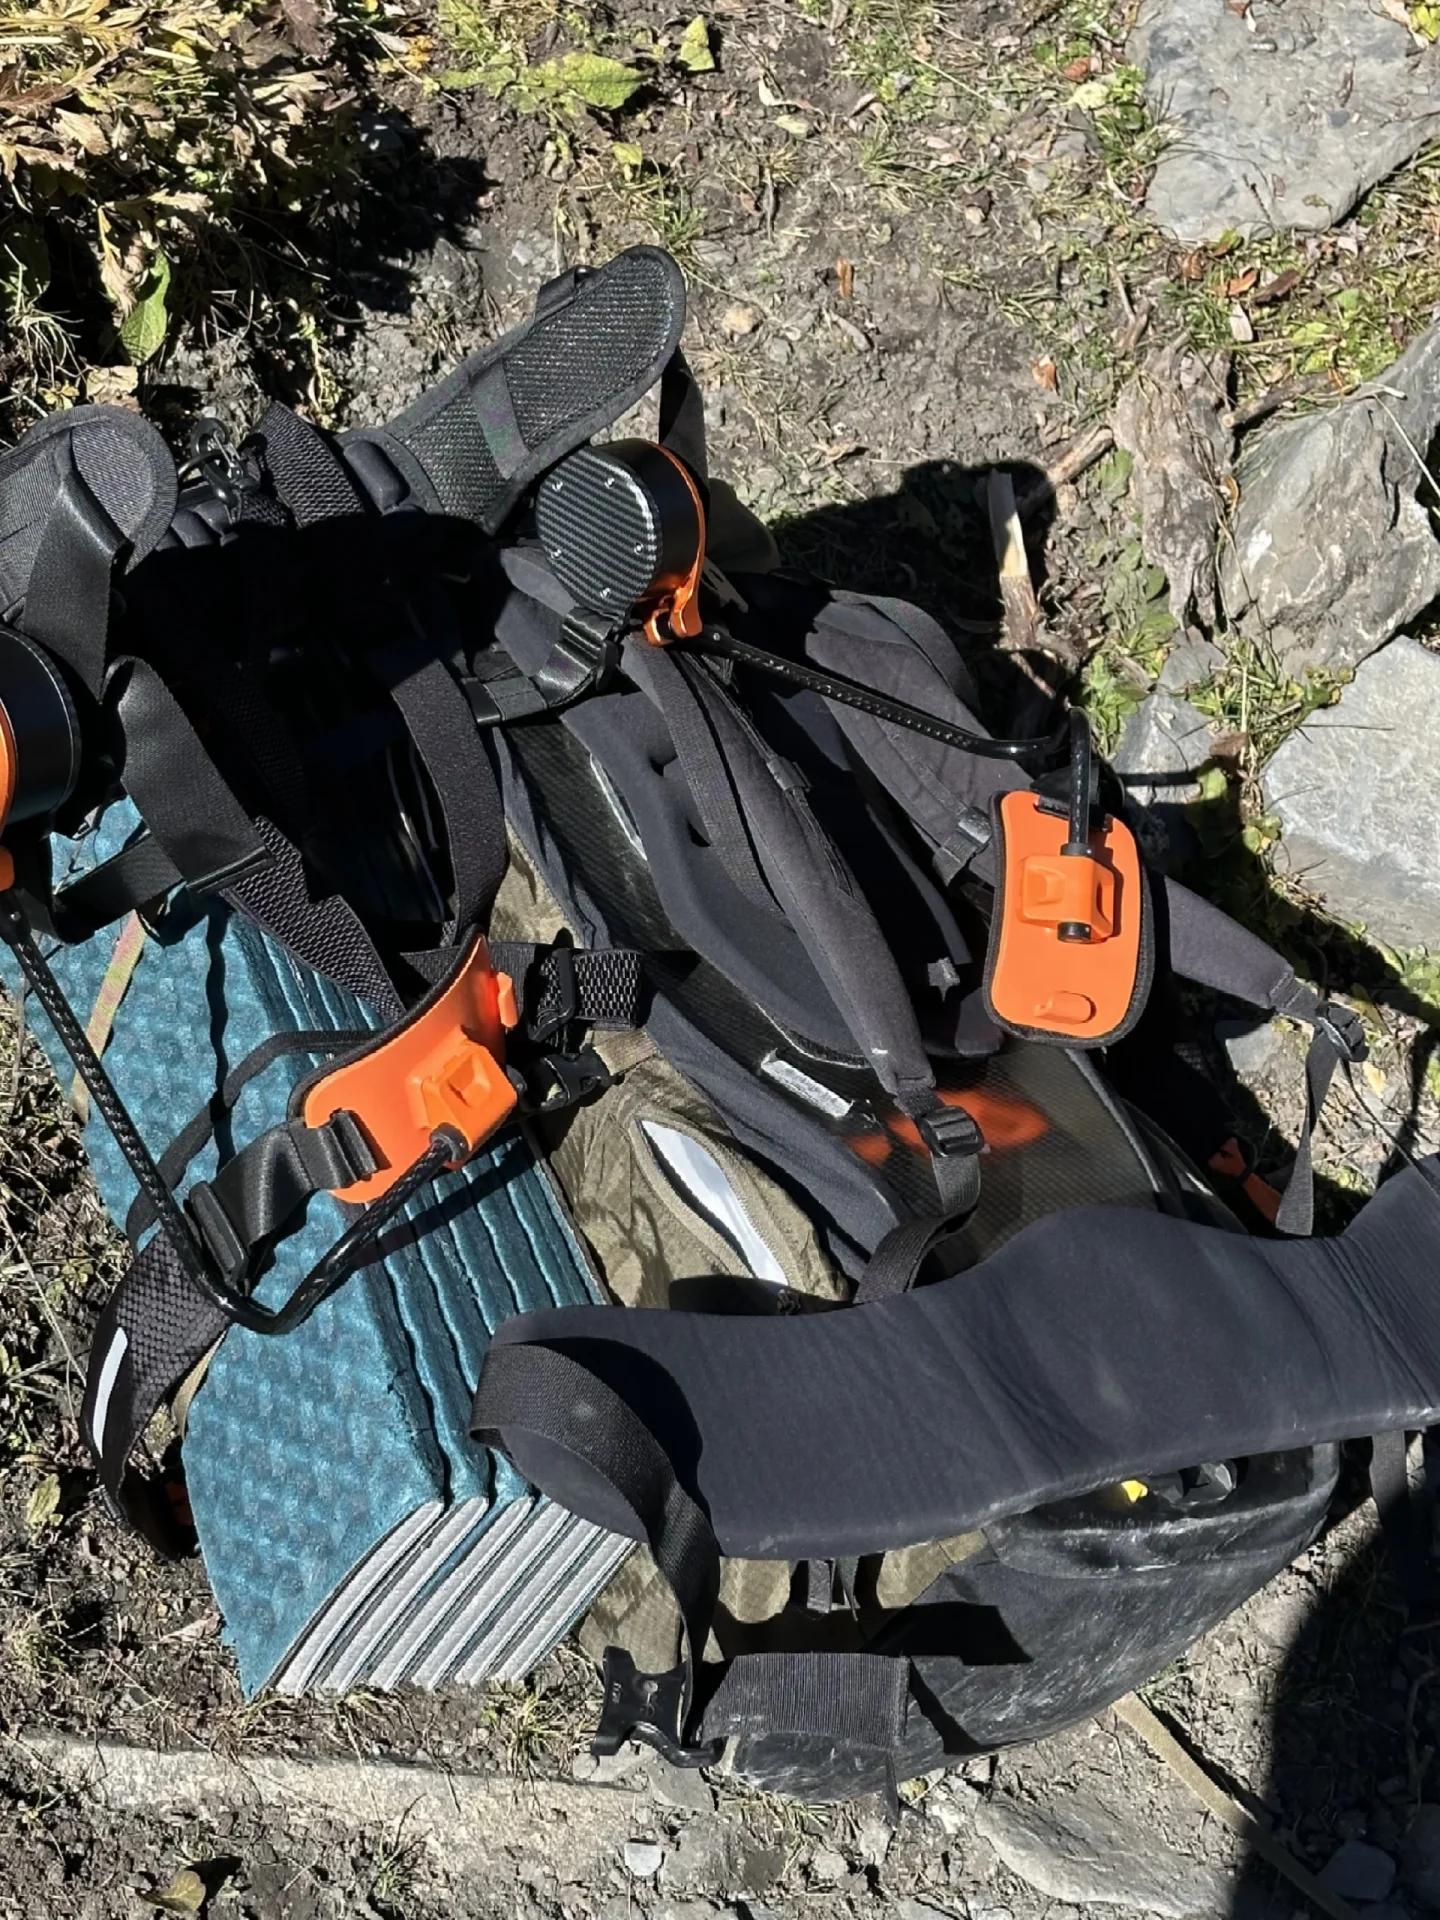
A rear battery and a backpack’s hip belt can need the same space. One wearer felt useful climbing assistance while carrying a large pack, but the battery lifted its back panel away from the hips. Check the complete arrangement before choosing a loaded route.
Leave room for the loaded pack. A hiker felt assistance lifting their legs uphill on a complex route while carrying a heavy backpack, but the rear battery pushed the bag away from the hips. Fit your intended bag with its normal load, then check that both pieces of equipment sit comfortably before adding distance.
Put water, layers, and the other essentials for your own outing in the bag when checking fit. Pay attention to the back panel and both sides of the hip belt as you walk.
If the battery changes where the bag sits, try a compatible arrangement or begin with a lighter day pack. Keep the equipment trial close to an easy return while you work out what feels comfortable.
Include the descent in your decision
Climbing assistance and downhill comfort deserve separate attention. Check the model’s available descent settings and include the return movement in your trial.
Check comfort on the way down. On a descent-heavy route, a wearer felt help climbing but more of the equipment’s weight around the waist when descending. Include an easy downhill section in the trial and adjust the fit before committing to a longer return.
Another wearer returned a rental after a little over an hour and switched it off on the way down. They then carried its weight without powered assistance. Before planning a longer outing, check how the complete equipment feels both in use and switched off.
For routes with frequent changes of surface or stride, leave time to stop and adjust. Begin with a familiar path, and keep the first outing within a walking distance that already feels comfortable to you.
Choose assistance for the way you walk
Mode choice is part of using the equipment well. The Dnsys X1 operating FAQ distinguishes assistance from resistance and states that the device supports walking rhythm rather than supplying balance. Select a mode intended for the activity and check that you can start, stop, and turn comfortably.
A daily exerciser found that the maximum level on flat ground encouraged a longer, more pronounced step than they wanted. A useful response is to reduce the setting and check your usual stride. Keep a comfortable pace while learning how the controls change the sensation.
Independent walking and balance also matter for an older person trying the equipment. Allow time to become familiar with the fit and controls on an easy route. Choose the activity from the product’s stated purpose and the walker’s ordinary abilities.
Account for stops, heat, and battery use
On a walk, putting the equipment on is only the beginning. One account mentioned difficulty using the restroom while wearing it. Practice releasing and refitting the attachments somewhere convenient before the group moves farther from facilities.
The warm-weather cleanup outing offers another practical prompt: check the waist unit and bag after you have been walking for a while. Pause to attend to pressure or discomfort, and keep the route flexible while you learn the arrangement.
For a longer outing, include the worn device, its battery, and any spare in the complete carried load. Read the manufacturer’s range conditions, then note actual battery use on a familiar short walk. Use that experience to plan the next outing with time and energy left for the return.
FAQ
What are the advantages of exoskeleton suits for hikers?
Powered leg assistance can make climbing and repeated steps feel easier. The difference may be especially noticeable for someone who finds that activity demanding. A light day-hike setup and a comfortable pace provide a practical introduction.
What disadvantages of an exoskeleton should be considered?
Consider added weight, battery planning, pack clearance, and comfort on descents and during ordinary stops. Try the complete setup through those parts of an outing before increasing distance. Adjusting the route or the bag can help make the equipment fit the activity.
What should be checked for exoskeleton safety?
Check the intended activity, fit, controls, and your ability to walk and balance independently. Practice starting and stopping on easy ground, keep an appropriate pace, and include rest breaks. Follow the operating directions for the exact device you are using.