A hiking walking stick gives you one handheld contact point, while a pair of trekking poles lets you alternate support with both arms as you walk. The useful difference is how the equipment fits your terrain, hands, and packing needs. For ordinary hiking, compare the grip, usable length, adjustment, and what you will do with the equipment when your hands need to be free.
The names overlap, so look at the equipment
“Walking stick,” “hiking staff,” and “trekking pole” are not perfectly separate labels. A hiking staff might be a wooden stick, a purpose-made single pole, or one member of an adjustable pair. Check the actual construction and intended use before choosing by name.
For this comparison, a walking stick means a single staff used on a hike. Trekking poles means a matching pair designed for walking trails. A single trekking pole can be used on its own, so the number you carry and the design you choose are related decisions.
A wooden staff may have a fixed length and a shaped or wrapped grip. An adjustable trekking pole has sections and locks that change its reach, while a folding design may pack into short sections. Some folding poles have a fixed deployed length; others also allow adjustment.
One stick and two poles feel different in use
A single staff leaves your other hand available when standing or walking on straightforward ground. You place one tip and coordinate one object. Think about which hand feels comfortable and whether that arrangement suits the trail you intend to walk.
Two poles let you use both arms in a walking rhythm. They also give you two grips, two straps, and two tips to manage. Practice on a path with room to learn the movement before adding a busy staircase or rough ground.
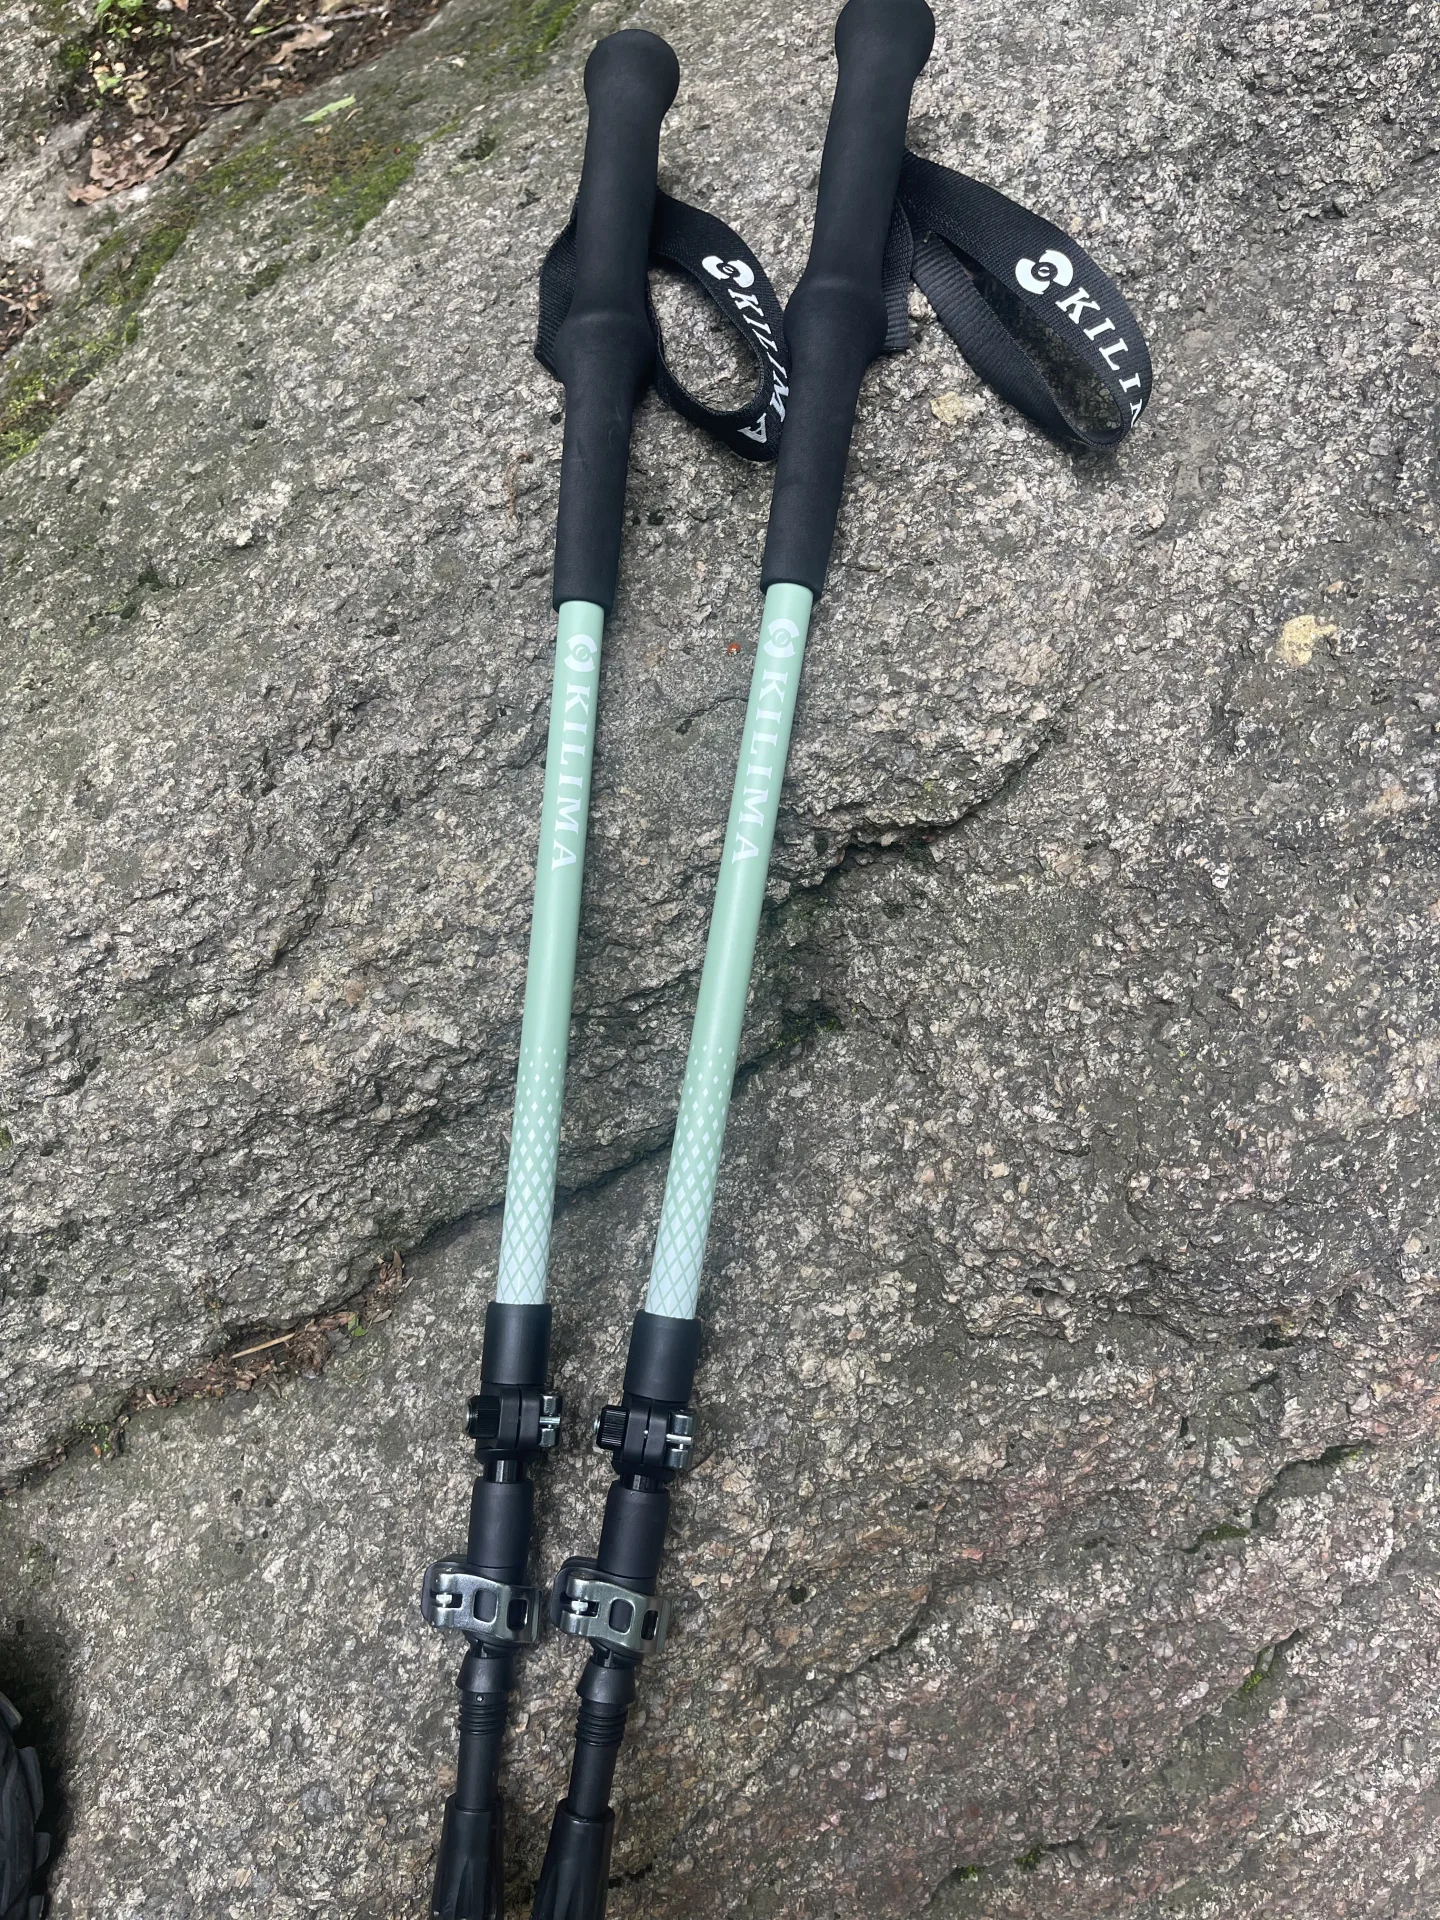
Start with a familiar walk. A first-time pole user photographed a pair of green adjustable poles on a mountain path and described the climb as feeling easier than walking empty-handed. Try the pair on a familiar short route so you can judge the movement and the grip for yourself.
On narrow trails, either arrangement needs room around other people. Stop before changing length, moving a stick between hands, or stowing equipment. If a section requires both hands, put the equipment away before entering it.
Compare the features you will actually use
Feature
A single hiking staff
A pair of trekking poles
Contact points from the equipment
One
Two, placed as you move
Length
May be fixed or adjustable
May be fixed, telescoping, or folding with adjustment
Grip
Check its shape and fit in your hand
Check both grips and the wrist straps
Packing
Depends on whether the staff collapses
Depends on the deployed and packed design
Trail routine
One item to plant and stow
Two items to coordinate and stow
These are things you can assess without deciding that one type is always better. Pick up the equipment, walk, stop, and put it away. Include your ordinary bag so the trial resembles the outing you have in mind.
If you already own a sound trekking-pole pair, compare using one and two on easy ground before buying a separate staff. Check the maker’s intended use and make sure each pole is correctly assembled. Keep your first comparison short enough to change the arrangement comfortably.
Grip shape matters more than a label
Try the grip with the clothing and gloves you expect to use. Check whether you can hold it without constantly squeezing, and whether a strap lies comfortably against your hand. Wet conditions may make the same grip feel different, so consider the weather you usually walk in.
One owner with several poles photographed their collection and expressed a preference for cork grips. That preference is a useful thing to try in person. Foam, cork, and other grip materials deserve a hand-fit check rather than a decision based only on the shaft material.
A T-shaped handle and a straight trekking grip offer different hand positions. Look at the intended activity and how you would hold the equipment through repeated steps. An appealing grip shape still needs to be paired with a suitable length and secure construction.
For a walking staff, inspect the grip area and the lower contact point. For adjustable poles, include the locks and section markings. Set aside equipment with loose fittings or damage until you can resolve the issue.
A handmade staff still needs a practical check
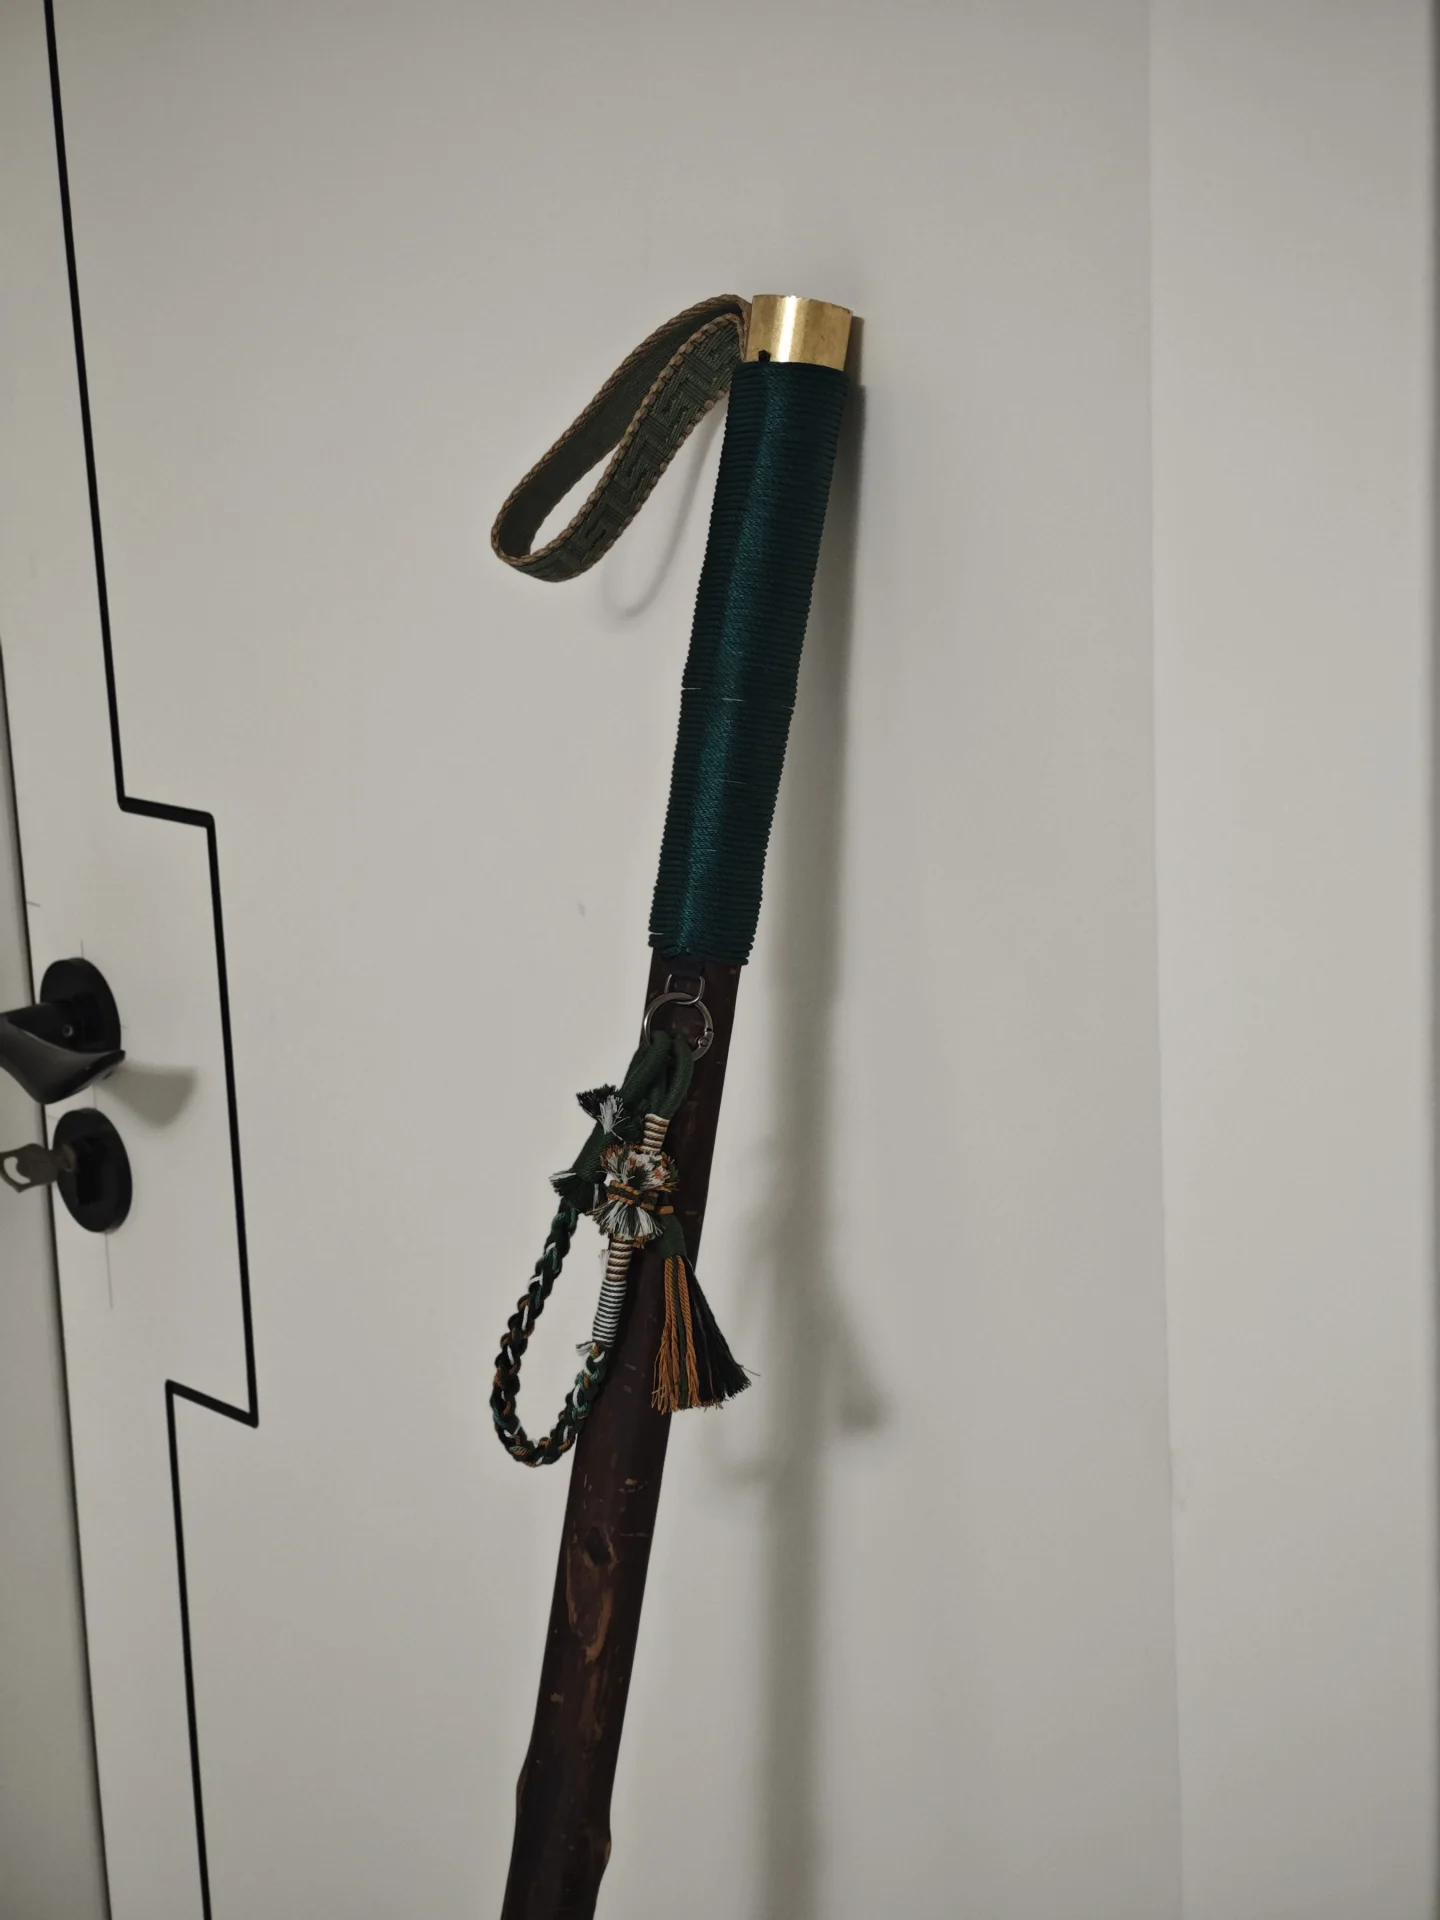
A handmade wooden stick can have a cord-wrapped grip, wrist loop, and fitted ends. Those visible details explain how the object is held and carried. They also deserve inspection before an outing, just as the fittings on manufactured equipment do.
Look closely at the fittings. One maker assembled a wooden staff with a wrapped grip, hand loop, and metal end pieces. Before using a similar staff, check the grip and ends for movement and try the complete item on easy ground.
Choose a length you can hold comfortably on the intended path. Include carrying it when you are not planting the tip. A fixed staff that feels comfortable during a short demonstration may be inconvenient to put inside a small day pack.
Keep any trial within ordinary walking conditions. You can decide whether the staff is convenient without using it to test a drop, a moving rock, or an uncertain crossing. Make route choices from the footing and your own ability to walk it.
How are ski poles different?
Ski poles are designed around a skiing task, with the corresponding length, grip, strap, basket, and tip. Some have a single fixed shaft, while others adjust. A similar appearance is a reason to compare the details rather than assume direct interchangeability.
For example, LEKI’s QNTM specifications identify a fixed-length, one-section alpine ski pole. Its length cannot be shortened for a climb or reduced for packing like a telescoping hiking pole. Check the purpose of the particular model you own.
Conversely, a trekking pole with a snow basket is not automatically a ski pole. Cascade Mountain Tech’s equipment guidance specifically separates its snowshoe use from skiing. Match the pole to the activity the manufacturer supports.
If you want one pair for several activities, write down each intended use before comparing designs. Confirm those uses for the exact model. A basket change addresses the contact area in soft ground; it does not answer every question about the rest of the pole.
What about snowshoe poles?
For snowshoeing, the pole needs a suitable length, snow basket, and intended winter use. Some trekking designs accommodate compatible snow baskets, while others have a different accessory system. Check the basket connection and the supported activity before changing parts.
You can use that same checklist in reverse for a dry trail. Consider the basket size, tip, length, and how the equipment packs. A large snow basket can be inconvenient where a smaller trail basket would fit the terrain better.
Try any accessory change at home and verify that it stays attached. Keep parts matched to their stated compatibility. Bring the equipment back to a simple walking test before taking it on a longer outing.
FAQ
What is the difference between a walking stick and a trekking pole?
For hiking, the terms overlap. A staff usually means one stick, while trekking poles commonly means a pair designed for trail use. Compare the actual grip, length, construction, and packing arrangement rather than the name alone.
Can hiking poles replace ski poles?
Only consider a crossover when the manufacturer supports the exact model for the intended activity. Check both the pole’s supported activities and the basket’s compatibility. Fixed alpine ski poles and adjustable hiking poles can also differ substantially in reach and packing.
Are snowshoe poles the same as hiking poles?
Some designs support both activities with compatible accessories. Check the manufacturer’s intended use, length range, basket connection, and winter suitability. Confirm the complete setup before treating an accessory change as a complete conversion.